
 Ok, so I am way behind on the blog compared to how much I have gotten done on my Dark Eldar. It's time to catch up. In this installment I'm going to show you the bases I made and how I did it. For this project I used non-slotta bases (doesn't really matter if they are if you don't mind an additional step of covering the exposed slot), a mix of fine and medium grit sand, PVA glue, and super sculpey. The sculpey is a clay that you can cook in your oven at home.
Step 1: I simply worked the clay until it was soft, rolled it out to the desired thickness on a cookie tray, and cooked it following the instructions on the box.
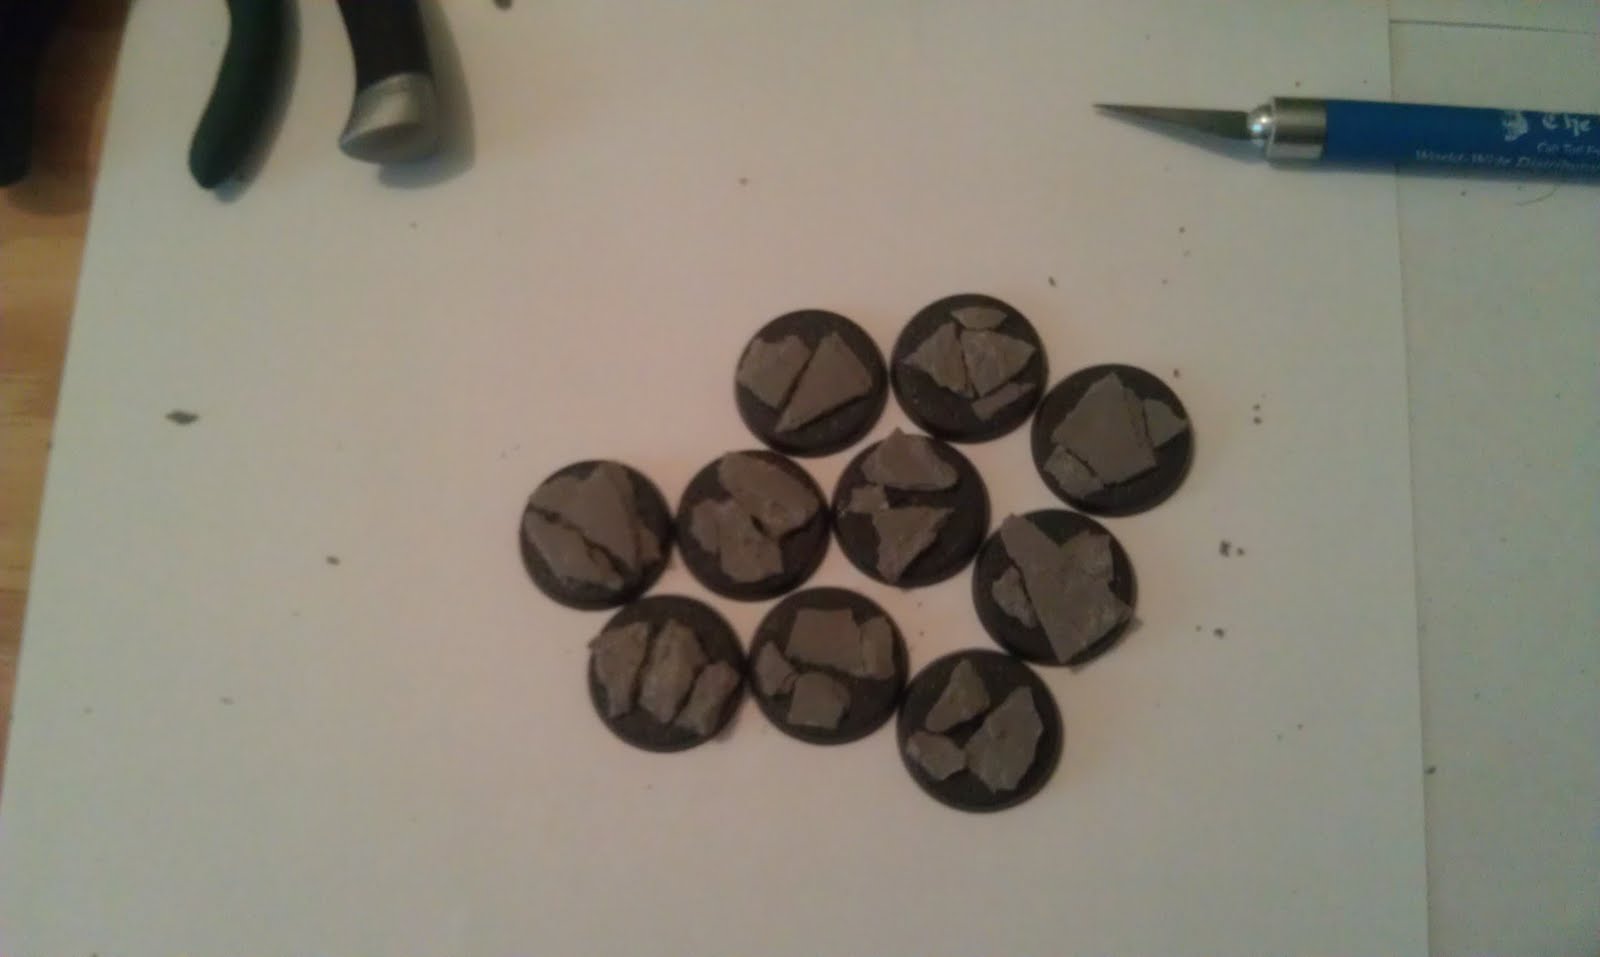 Step 2: After the clay bakes you need to let it set for about an hour. This is because it can be a little soft at first but then becomes very hard. I just started breaking pieces off and arranging them on the bases in a random manner. I often had to shape pieces with a hobby knife to get nice natural looking rocks.
 Step 3: PVA glue was added to the empty parts of the base. The bases were covered in the mix of sand and excess was knocked off. Obvious but important, let the glue dry before moving on. From that comment you can probably tell at some point in the past I messed things up.
Step 4: I applied the base color which was bootstrap leather. I usually put this on pretty heavy to make sure it gets in all the little cracks and holes.

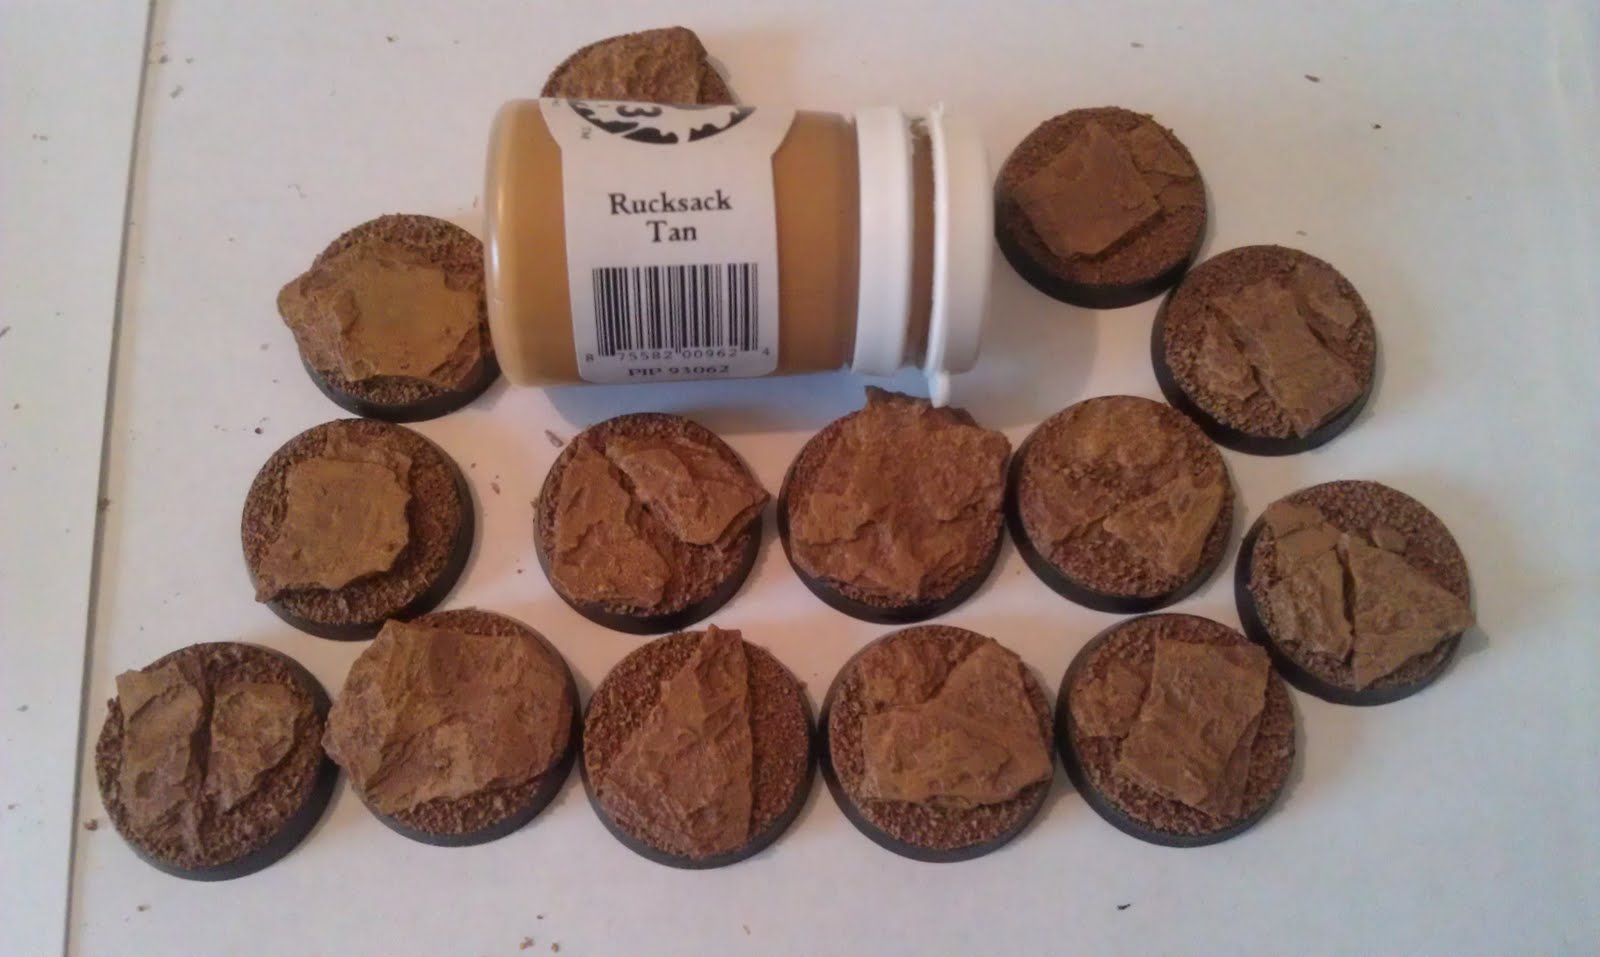
Step 5: The last step is adding the highlight coat. It was just a heavy dry brush. That's all there is to it.
To give you an idea, if you are interested in making something similar, I sat down one morning and decided to make 20 bases. Already having the clay baked the night before it took a grand total of 90 mins. That's it today. Currently I am already painting warriors and incubi so I'm hoping to have pics of them up soon.
No comments:
Post a Comment